How to configure group registration?
The group registration module in CONREGO allows for easy and convenient registration of multiple people for an event. This feature enables organizers to register a group, manage its members, issue a collective VAT invoice, and customize the registration process to specific needs. By default, the person registering the group is not considered a participant but acts as the contact person and invoice recipient. If they also want to attend the event, they must add themselves as a participant during the registration process.
Group registration is ideal for cases such as:
- Registering a team of employees under one collective VAT invoice,
- Registering a group for a trip including a guardian and their group,
- Registering participants who may bring a companion (e.g., for a banquet at a conference).
1. Configure ticket types and registration templates
Before enabling group registration, create a ticket type dedicated to group leaders.
Go to Settings > Tickets & Forms. Create a new ticket type and assign a registration template with form fields and email content tailored for the person registering the group.
Then, create ticket types for the actual participants and assign them appropriate registration templates. You can configure different offers and prices for each type (if the event is paid). Also consider what data you need from each participant (e.g., contact info, dietary preferences). If both individual and group registrations are allowed, name the ticket types clearly.
2. Configure sales if the registration is paid
If registration involves payments, go to Settings > Sales Settings and set up the payment step. Decide which payment methods will be accepted (e.g., bank transfer, online payments) and what data is required from the payer.
3. Enable group registration
Go to Settings > Group Registration.
On this screen, enable group registration by selecting YES. This will allow one person to register multiple participants within a single registration session.

You must define the maximum group size, i.e., the number of people allowed in one group. This is essential to keep control over the number of attendees per event.

Next, choose the ticket type to be used by the group leader. This should be a separate type so that group leaders are easy to identify.

Then, select which ticket types should be available for individual registration, and which for group registration, using the appropriate checkboxes.
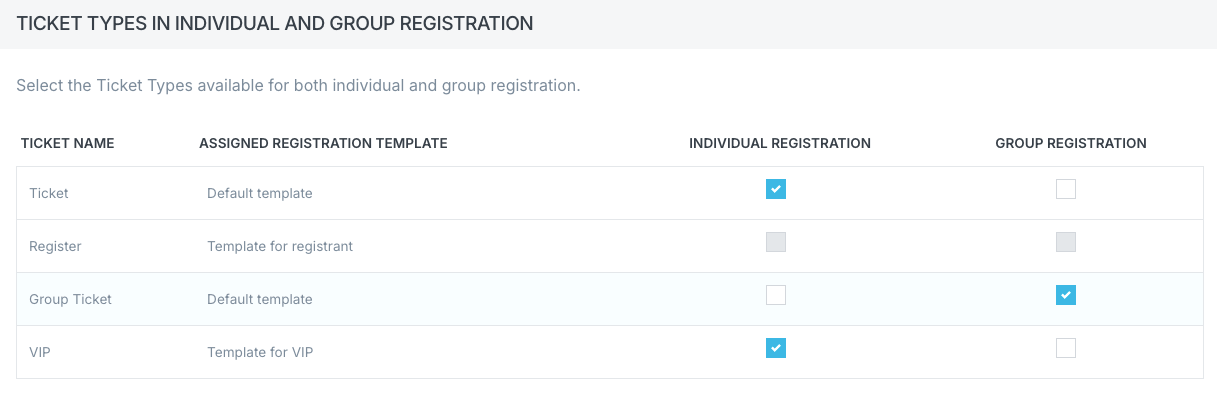
Note: The group leader's ticket type should not be available in either individual or group participant registration. It is used only to identify the person registering the group.
4. Configure discounts (optional)
You can apply automatic discounts depending on the number of registered participants. Learn more and see examples [here – add link].
5. Test your configuration
After saving the configuration:
- Go to your event’s registration page.
- Perform a test registration both individually and as a group.
- Check whether all data, steps, and messages work as expected.
Key considerations
- Only the group leader receives confirmation and transaction emails.
- The group leader is not automatically a participant – they must add themselves if they wish to attend.
- On the leader's participant card you will find:
- Group size and selected offer items per participant,
- Registration amount and generated invoices,
- Sent automatic messages (confirmation and transaction),
- Option to download all group data.
- In paid group registration, only the leader receives a multi-line VAT invoice listing all registered participants.
- Only the leader’s card allows creating a transaction using the + Create transaction button. It is possible only for custom amounts.
- Individual group members cannot have transactions assigned directly to them.
- To delete a group, you must delete the entire group including the leader. No group members may remain without a leader.
- Cancelling the leader’s registration cancels the whole group.
- Each participant may receive an individual QR code for check-in and access control.
- Each group member can receive personalized documents (tickets, certificates) and communications (emails/SMS).
- Use system tags to access group-level data in summaries, confirmations, and emails.
- Corrective invoices are not available for group registrations – only for individual ones.
By following these steps, you’ll set up an efficient and flexible group registration process tailored to your event’s needs.